How To: Check Electrolyte Level in Flooded Lead Acid Batteries
- by Joe Weber - updated on 3/18/2024
We've talked about it many times and now it's time to show you. Checking the electrolyte level is an important part of your flooded lead-acid battery maintenance routine and is easy to complete. Keep reading to learn how to complete this simple and important maintenance task.
Safety First
We say this all the time and it's not because we like to, it's necessary. You should take some precautions before you begin working with your batteries.
- Wear safety glasses
- Wear acid-resistant clothing and gloves
- Remove any jewelry that could come in contact with battery terminals
- Don't work near open flames or sparks
- Don't smoke!
Step 1: Charge the Battery
Before beginning, make sure your battery is fully charged. If it is not fully charged, connect it to a battery charger and let it charge to 100%.
You should never top-off submerged cells when the battery isn't charged fully. Doing so could result in an overflow of electrolytes if you fill them partially charged and then charge them after.
Step 2: Disconnect the Battery
Disconnect both positive and negative battery connections. Disconnect the positive first. Move the cables out of the way so they are clear of any accidental connections.
Step 3: Clean the Battery
It's important to keep the top of your battery clean, and not just to prevent dirt and grime from falling into the battery when you remove the filler caps. Keeping the battery clean is also a good way to prevent unwanted discharge and keep the terminal connections secure with good metal-to-metal contact.
- Use a damp cloth to wipe down the battery, ensuring that the top of the battery is clean and free of debris that could accidentally fall into the battery.
- Remove any corrosion and clean the battery terminals by using a wire brush and a mixture of baking soda and water or a terminal cleaner.
- Dip the brush in the baking soda mixture or spray the terminals with the cleaner and gently scrub the terminals to neutralize any battery acid and remove corrosive material.
- Wipe the battery and terminals clean with a dry lint-free cloth.
Step 4: Check the Electrolyte Levels
Now that the battery and terminals are clean, we can safely remove the filler caps to check on the electrolyte.
- Remove the plastic caps on the top of the battery to access the individual battery cells. You may need to lightly pry them up with a flathead screwdriver.
- Once the caps have been removed, carefully wipe away any debris that may have collected underneath being careful not to drop anything into the battery.
- Now that you have the caps removed, you can visually inspect the battery cells.
- Look down into the filler hole, if you can see the lead plates protruding from the electrolyte solution, more must be added.
- If the plates are covered, but barely, more should be added.
- The lead plates should be completely submerged in liquid.
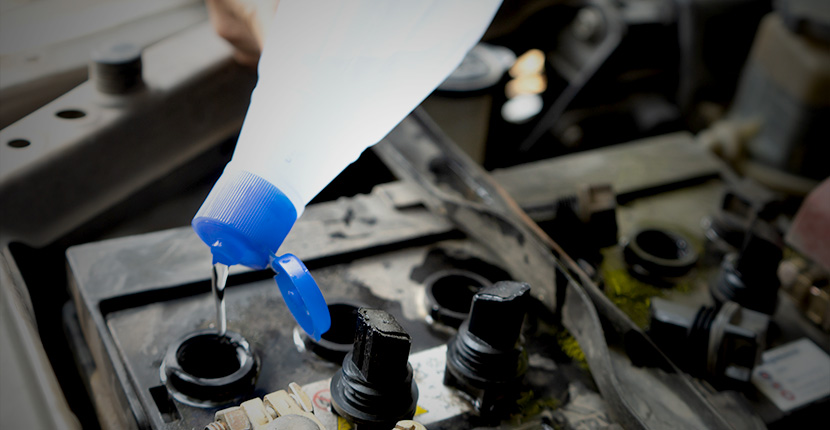
Step 5: Add Distilled Water
If you see that your battery plates are exposed or close to it, you need to add some distilled water to each cell to cover the plates, leaving about ⅛th to ¼ inch of space beneath the bottom of the filler hole. Only use distilled water. Do not use other forms of water to do this.
Filling golf cart batteries is an important part of spring preparations. Make this task easier than ever with a Flow-rite watering system. Watering systems are permanently installed on your batteries to provide an easy solution to filling batteries. To learn more about watering systems and why you should use them on your golf carts read our recent blog "What Is A Golf Cart Battery Watering System?".
Once the batteries have been filled with distilled water, replace the filler caps.
Step 6: Reconnect the Battery
After the battery has been cleaned and filled you can reinstall the battery (if you removed it completely) and reconnect the positive and negative battery cables. Connect them in the reverse order, negative first then positive.
And that's it, you're done. That wasn't that difficult, right? Bookmark this page or print it out to keep these instructions handy. This is something that you should be doing fairly regularly to keep your battery happy and healthy as it ages.
Batteries Plus Is Here to Help
How's the battery running after you've filled the cells and cleaned the terminals? Great? Perfect! That's what we like to hear. However, if your battery is still showing signs of wear and tear even after cleaning it up and filling the electrolyte, bring it into your nearest Batteries Plus to have our battery experts test your battery free of charge to see exactly how it's fairing.
If you find that your battery needs to be replaced, we carry a great selection of lead-acid batteries for whatever application you need it for. Whether it's a car or truck, boat, golf cart or other applications, we've got you covered with batteries from all the popular brands.